


If you are unfamiliar with the term "Quillow" let me explain. A quillow is a quilt that folds into a pillow (get it quilt+pillow=quillow). It has a pocket built in that you fold the blanket into. BUT that pocket is also PERFECT for tucking your cold toes into to keep them warm because when I'm lounging on my couch I know that the worst thing is when your feet come uncovered from your blanket.
So anyway I set out looking for a pattern for a Rag Quilt style quillow, as that was the level of sewing I was comfortable with (I've gotten a little bit more ambitious in the past months but I'm still learning). I found a few tutorials on different quillows, but none were rag style so I realized that I would have to figure it out on my own. Sharing this project is actually the reason I made a blog, but I didn't have the money for fabric till my summer jobs started (that's right jobS plural) and then I started working and could buy supplies and didn't have time to make it and write up a tutorial. But I made time! and here it is!
You will need:
- 8 yards of flannel fabric (you will have a bit left over but I like to over-buy and be safe incase I cut something wrong. You could probably get away with 7 yards... but I buy 8)
- 1.5 yards Warm and Natural batting or similar batting
- Thread
- Sewing Machine
- Rotary cutter and mat (I really recommend this cutting by hand with scissors would be no fun)
- Fiskars 8 Inch Easy Action Rag Quilt Snip Scissors
are optional but really really helpful. If you plan to make more than one quilt buy them for sure. Your hands will thank you

First lay your fabric still folded on your cutting board with the original fold lined up with a guide line on your board. Trim the selvedge edge then cut your fabric into 9in X the width of the fabric strips. You need a total of 48 square sandwiches. By that I mean when you cut the folded fabric you end up with two identical squares with wrong sides of the fabric together. but each 9in strip gives you 2 sandwiches so you need to cut 24 9in strips. Below are all of my strips. You can totally do more patterns of fabrics but I like to keep mine simple.

After you have all of your strips you need to cut them into squares. First line up the top edge with a guide line and cut off the selvedge edge.

Then measure 9in and cut from there

Repeat cutting another 9 in square.

You will be left with a folded over scrap. Unfold it and add it to your scrap pile. I've actually made some fun projects out of the scraps from some of my quilts. Repeat this process with all of your strips and you should have 48 square sandwiches.

Then do the same process with your batting only you want 7.5in squares and you don't have to keep them doubled. So you need a total of 48 single batting squares.

This is what everything cut out looks like (I have more than 48 batting squares though because I have another quillow to make)

. Next you want to place a batting square inside of each fabric sandwich. To do this and keep the fabric matched up well I peal the layers apart at a corner to open it up

Then I center a batting square on one side of the fabric, tuck it under the corner carefully and close it back up and pin them together.


Do this with all 48 sandwiches and then you are ready to start the sewing!
I should be honest with you though. I HATE pinning. it takes forever and I am super lazy. So I put my Walking Foot on my machine and just hope that is keeps the layers from shifting which so far it has done perfectly. But if you don't have a walking foot I would highly recommend the pinning of your layers so they don't shift.
Now begins the sewing, or rather the quilting. You are going to put an X through each of your sandwiches to hold them together. You do this by putting one corner of your fabric under the presser foot and kind of pull on the other corner so it looks like it is feeding straight.

Then you just run it through your machine guiding it gently so it stays straight. Then when you get to the end of one square give it a little tug from the back just to get it out from under the presser foot and put a new square corner in. This saves A LOT of time and thread.

When you finish all of the squares going on direction cut the thread from the machine, then cut each square apart. After that you just sew them from the other corner until all 48 sandwiches have an X sewn through them.

Now it's time to start sewing blocks together. I like to start by making sure all my blocks are facing one way (if your print has direction like my bird fabric does) then put one square on top of another. Make three stacks with the same color on top and pin one side.

Sew along the pinned edge on all three sets using a 1/2 in seam allowance

Now place one of the sewn sets of two with the seam on the bottom. Then place another set with the seam facing up. Make sure you keep track of the direction of the fabric. Pin the right edge and sew it with the same seam allowance. When you're done it should look like this.

Now place the third set of two on the right edge of your row of 4 squares and sew this should be your finished result of your first row.

Then repeat the process only starting with the opposite color on top so the first square is the opposite color.

They should fit together like this.

Flip on of the rows under the other. The bottom row should have the seams down and the top row with the seams up. The print on the bottom row should be upside down, and the top right side up. Now you can pin the rows together. I always pin the rows together very carefully so I can make sure the corners of each square matches up. Make sure to pin the top seam forward so you can ease it into the presser foot. Push the bottom seam backward, you can pin it if you want but it goes backwards on its own.


Your end result should look like this.

When you flip it over, if you kept all of your seams consistent your squares SHOULD match up like this. But if not, oh well, it's the back!

Repeat this process until you have 6 rows completed, sew them into 3 sets of two rows, you should have 12 squares left, enough to make the bottom 2 rows. They have to be sewn together differently so that you can put the pocket in. Before you start sewing the bottom two rows together you need to cut two rectangles each measuring 20in by 16in.

To form the pocket place your rectangles right sides together and pin the top seam. It should be the 20in seam so pay attention if your fabric has direction. Sew the top seam with a 1/4in seam allowance.

Flip the fabric right side out and iron the seam flat.

Then top stitch the top of the pocket. I used a 1/2in seam.

Now your pocket is ready and you can start to build your last two rows. Lay both rows out one above the other.

Then pin the squares in twos, basically just like you did to build the rows before. Sew with a 1/2 seam allowance

They should end up looking like this.

Then instead of attaching your pairs in rows you are going to pin the pair on the upper row to the pair on the bottom row. Essentially you are making three squares.

When you sew them and open them back up it will look like this, three squares.

Now is time to put in the pocket. flip one square over, then match the pocket up to the bottom right edge on the square. There will be a little gap where the pocket is a little shorter than the square, this is so you don't accidentally sew the pocket closed when you attach this piece to the rest of the quilt.

Now put another square on top of the pocket, this time with the seams up, pin and sew with a 1/2in seam allowance.

Now open that back up and line the other side of the pocket to the bottom left side of the center square.

There is a little more pocket fabric than the width of the center square. We'll deal with that in a bit, But now put your last square on top of the left seam of the center square, pin and sew. Open it and the back should look like this

Now you will put two little pleats in the middle of the bottom of the pocket because it is bigger than the center square. This is to make it easier to fold the blanket into the pillow. I really just eyeball it to try to get it to the center.

Sew all of your rows together just like you did with the previous rows. Make sure your pocket is on the bottom

See pocket on the bottom

Last step using your sewing machine, Sew a 1/2in Seam all the way around the perimeter of the quilt. it will be at this point that you sew the bottom of your pocket closed. Be sure to ease your pleats into the machine carefully.

Here is what one corner looks like.

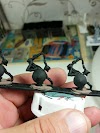
Now for the cutting! grab some sharp scissors (I am serious about that, and really really suggest the specially made rag quilt scissors) park yourself on the couch and start snipping at all of the exposed seams.

Don't cut into your sewn lines, but just up to them and snip about every 1/4in.

Before you know it all your seams will be cut and it will look fuzzy and fun like this.

Now take your quilt outside and give it a really rigorous shake. There will be a lot of strings and fuzz to get off of your quilt. Then you put it in the washing machine, and then the dryer. You really should clean the lint trap several times throughout the drying process and put it in the dryer all by itself or all your other clothes will be covered in strings. There will be a lot of lint. Take it back outside and give it an even more rigorous shaking. Your seams will have fuzzed up like this :-)

Now your whole blanket will be soft and fuzzy.

And the best part! here it is as a pillow! Great for traveling, I'm even toying with the idea of putting handles on the next Rag-Quillow I make!

*This post includes affiliate links. If you purchase any of the items off of Amazon after clicking on my link, then I get a small amount of money*


0 Yorumlar